Protégé 5 Documentation
Class Hierarchy
The class hierarchy view displays the asserted and inferred class hierarchies. The asserted class hierarchy is visible by default.
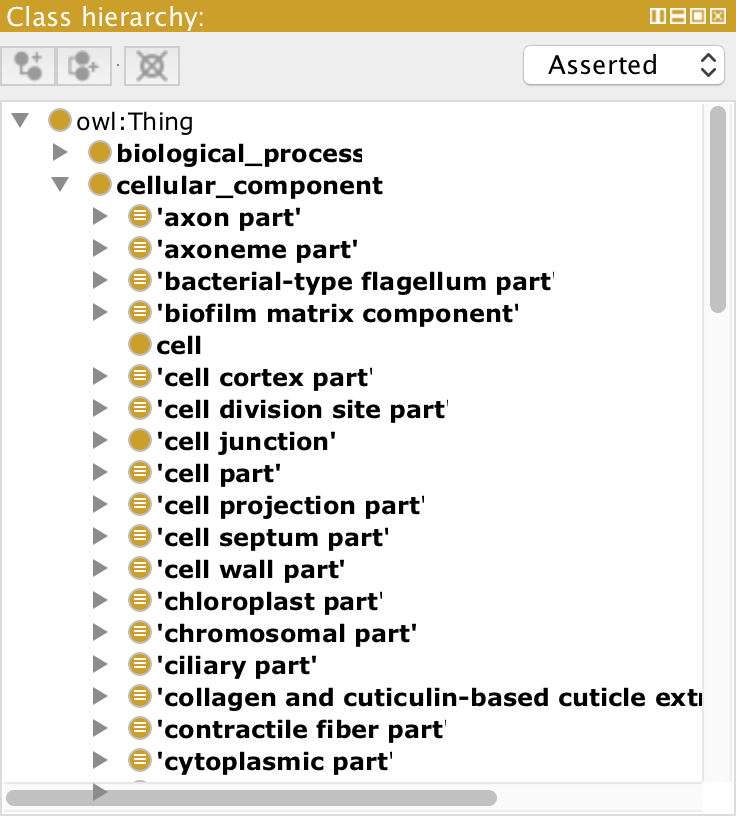
The asserted class hierarchy view is one of the primary navigation devices in Protégé. It is presented as a tree where nodes in the tree represent classes. A child-parent relationship in the tree represents a sub/super class relationship in the class hierarchy. (Note: Starting with Protégé version 5.5 the class hierarchy can show other relationships as well. For details please check out the Display relationships section.)
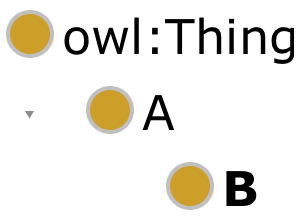
In the asserted class hierarchy, a class will be shown as a child of another class in the tree if it is asserted to be a SubClassOf that other class, or if it is asserted to be EquivalentTo a class expression that is an intersection containing that other class as an operand. For example, if the ontology contains A SubClassOf B, then A will appear under B in the tree. Similarly, if the ontology contains E EquivalentTo B and D (where D is any other class expression) then E will also be shown as a chid of B in the tree. Any classes that are not asserted to be a subclass of some other class will show up directly under owl:Thing (the root).
Note that names in the class hierarchy are quoted using single quotes if the name contains spaces. The quotes, however, are not part of the name.
Switching between Asserted and Inferred modes
The asserted class hierarchy is shown by default. To switch to the inferred hierarchy either select “Inferred” from the drop-down or press ‘i’ when the hierarchy has the focus. If the inferred hierarchy is shown, the asserted hierarchy can be displayed by selecting “Asserted” from the drop-down or press ‘a’ when the hierarchy has the focus.
Inserting New Classes
In order to insert new classes into the class hierarchy, the Asserted class hierarchy must be selected.
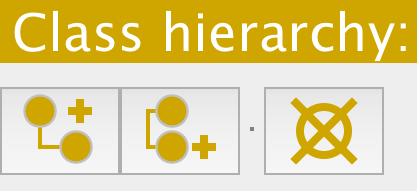
New classes can be inserted into the class hierarchy using the class creation buttons at the top of the hierarchy, by using the popup menu that is displayed by right clicking (CMD+Click on a Mac) on the class hierarchy, or by using keyboard shortcuts. These mechanisms are described in more detail below.
- Add SubClass Button - Make sure that the Asserted class hierarchy is selected. Select a class and press the “Add SubClass” button. A dialog will be displayed for specifying the name of the new class. The new class will be inserted as a subclass of the selected class.
- Add Sibling Class Button - Make sure that the Asserted class hierarchy is selected. Select a class that the new class will be a sibling of and press the “Add Sibling” button. A dialog will be displayed for specifying the name of the new class. The new class will be inserted as a sibling class of the selected class.
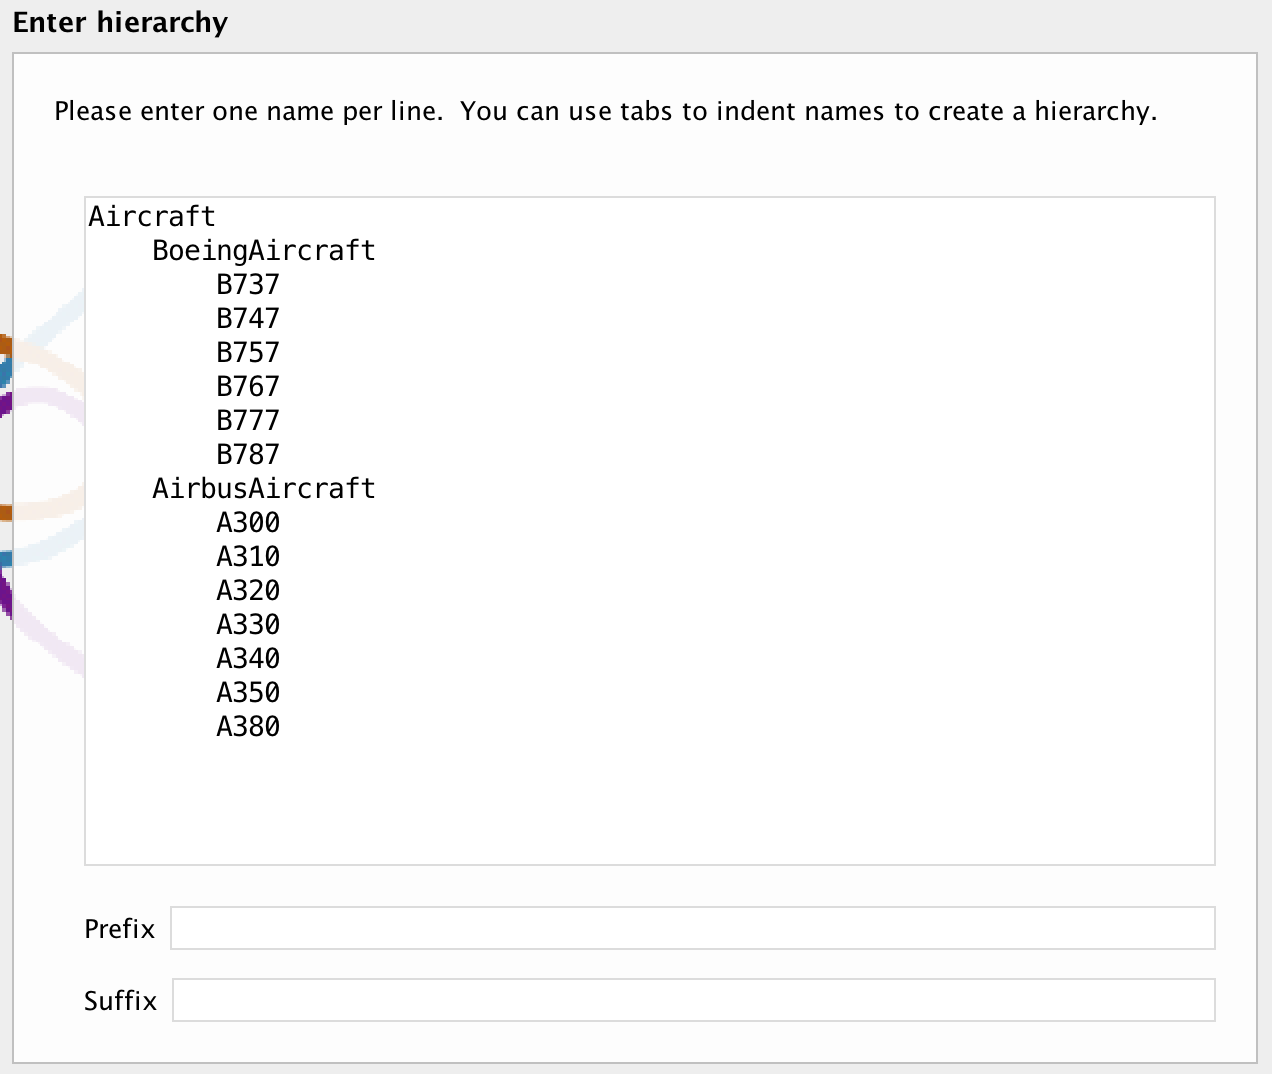
- Add SubClasses Popup Menu Item - Make sure that the Asserted class hierarchy is selected. Right click (or CMD+Click on a Mac) a class in the class hierarchy. The popup menu will be displayed. Select the “Add SubClasses…” item from the menu. The wizard shown below will be displayed for entering a tab indented hierarchy of class names. The tab indented hierarchy that you enter will be converted into a sub-hierarchy that will be rooted at the selected class.
- Add SubClass Popup Menu Item - Make sure that the Asserted class hierarchy is selected.Right click (or CMD+Click on a Mac) a class in the class hierarchy. The popup menu will be displayed. Select the “Add subclass…” item from the menu. A dialog will be displayed for specifying the name of the new class. The new class will be inserted as a subclass of the class that was clicked.
- Add Sibling Class Popup Menu Item - Make sure that the Asserted class hierarchy is selected. Right click (or CMD+Click on a Mac) a class in the class hierarchy. The popup menu will be displayed. Select the “Add sibling class…” item from the menu. A dialog will be displayed for specifying the name of the new class. The new class will be inserted as a sibling class of the selected class.
- Add SubClass Keyboard Shortcut - Make sure that the Asserted class hierarchy is selected. Select a class and press
Ctrl+Eon Windows/Linux orCmd+Eon a Mac. A dialog will be displayed for specifying the name of the new class. The new class will be inserted as a subclass of the selected class. - Add Sibling Class Keyboard Shortcut - Make sure that the Asserted class hierarchy is selected. Select a class that the new class will be a sibling of and press
Ctrl+Shift+Eon Windows/Linux orCmd+Shift+Eon a Mac. A dialog will be displayed for specifying the name of the new class. The new class will be inserted as a sibling class of the selected class.
Deleting classes
The class hierarchy can be used to delete classes (axioms that mention the classes will be removed from the ontology). Select the class (or classes) to be deleted and then activate delete:
- Delete selected class - Make sure that the Asserted class hierarchy is selected. Select the class (or classes to be deleted). Press the “Delete selected class” button on the class hierarchy toolbar.
- Delete class Menu Item - Make sure that the Asserted class hierarchy is selected. Select the class (or classes to be deleted). Select the “Delete class…” item from the Edit menu.
- Delete Keyboard Shortcut - Make sure that the Asserted class hierarchy is selected. Select the class (or classes to be deleted). Press the
Deletebutton.
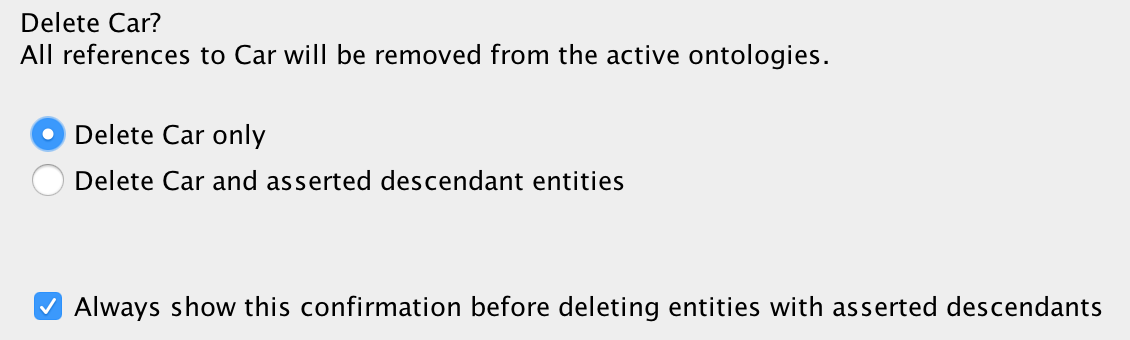
After activating delete in one of the ways described above, the “Delete class” dialog will be displayed (shown below). Select the option to either delete the selected class, or delete the selected class and all of the descendants of the selected class in the asserted class hierarchy. Protégé will compute the classes to be deleted based on the selected option and will then remove all axioms that mention these classes from the set of active ontologies.
Icons
The class hierarchy contains two types of icons: Solid yellow icons and yellow icons with three white lines through the middle, representing the equivalence symbol.
The icons containing the equivalence symbol (three white lines) denote classes that are asserted to be equivalent to some other class expression. These are known as defined classes.

The solid yellow icons denote classes that are not defined classes (i.e. aren’t asserted to be equivalent to some other class expression). These classes are known as primitive classes.

Bolding
The class hierarchy view may show some names in a bold font and others in a regular font. Roughly speaking, classes whose names are shown in a bold font are described using axioms in the active ontology. This means that the class appears on the left hand side of a SubClassOf axiom, in an EquivalentClasses axiom, in a DisjointUnion axiom or in a DisjointClasses axiom. Classes whose names are shown in a regular weight font are merely referenced in the imports closure of the active ontology.
Drag and Drop
It is possible to edit some of the SubClassOf axioms in the ontology by dragging and dropping tree nodes in the asserted class hierarchy. Drag and Drop only works for primitive classes - that is, classes that have a solid yellow icon. Dropping a class on top of an other class will make it a SubClassOf that other class.
Display relationships
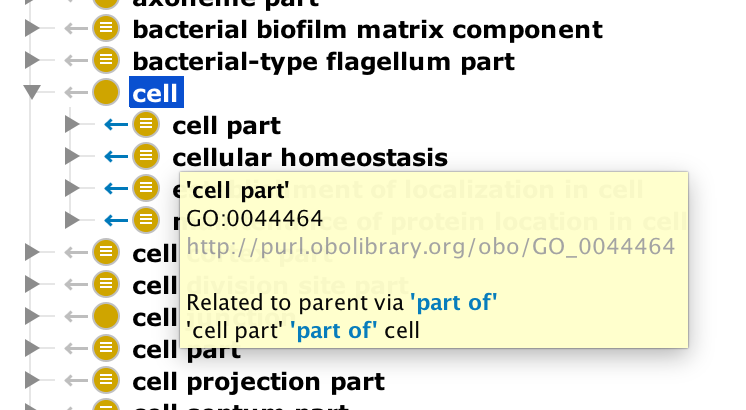
As described in the introduction, by default, the class hierarchy tree is generated based on SubClassOf axioms. Starting with Protégé version 5.5, however, the class tree can also display other parent/child relationships besides SubClassOf. This feature can be activated and deactivated using the View -> Display relationship in class hierarchy menu. When display relationships is activated, the class hierarchy will show an additional arrow icon in the front of the solid yellow class icon. The arrow will be gray for the standard subclass-superclass relationship, and it will be blue for any other relationship that is based on an axiom involving an object property. An example is shown below.
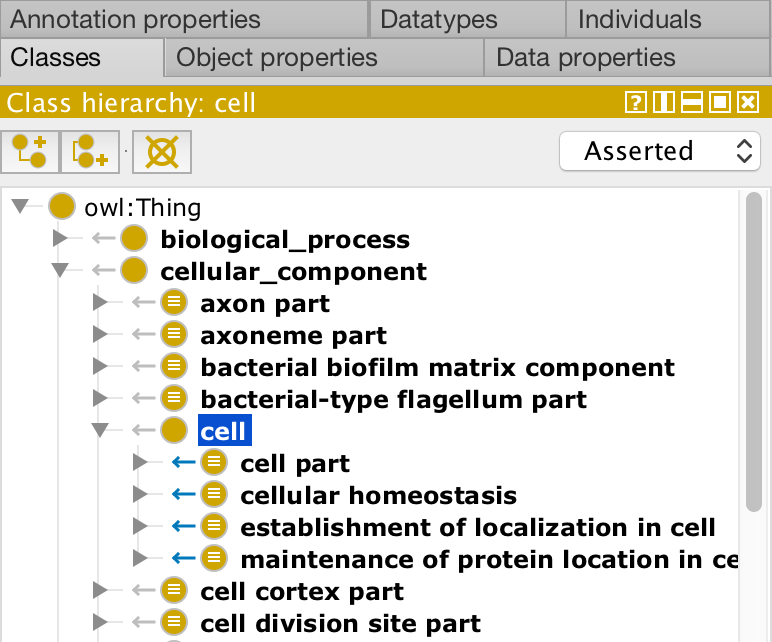
Hovering over a class that has a blue arrow displayed in front of it will generate a tooltip, which, besides the usual information (display name, IRI, and OBO id, if applicable), will also show the name of the object property through which the class is related to its parent class. For an easier interpretation, the tooltip will also display a verbalized version of the full relationship between child and parent. See an example below.